

This guide contains affiliate links. If you buy through them we earn a small commission at no extra cost to you. We only recommend gear we would use in our own training. How we choose products.
The short answer: most beginners reach their first strict pull-up in 4–8 weeks and 10 consecutive reps in 3–5 months, training three times per week. The path runs through four testable milestones — a 45-second dead hang, controlled 5-second negatives, your first full rep, and volume work — and this guide covers every stage, up to the bar muscle-up.
The pull-up is the most honest strength test in bodyweight training: no momentum, no leverage tricks, just your ability to move your own weight through a full range of motion. It is also the exercise people quit fastest, because pulling zero reps feels like a wall. It is not a wall. It is a staircase, and every step below is testable, so you always know exactly where you stand.
The Four Milestones
| Milestone | Test | Typical timeline | You are ready for |
|---|---|---|---|
| 1. Hang | 45-second dead hang | Week 1–2 | Scapular pulls, negatives |
| 2. Control | 3 × 5-second negatives | Week 3–4 | Band-assisted reps |
| 3. First rep | 1 strict pull-up, chin over bar | Week 5–8 | Low-rep volume work |
| 4. Volume | 10 consecutive strict reps | Month 3–5 | Weighted and advanced variations |
Timelines assume three sessions per week and a body weight you can realistically hang with. If you are significantly above your comfortable hanging weight, expect the early phases to take longer — and know that every kilogram lost shortens the path. Pull-up strength is the best strength-to-bodyweight ratio test there is.
How to perform
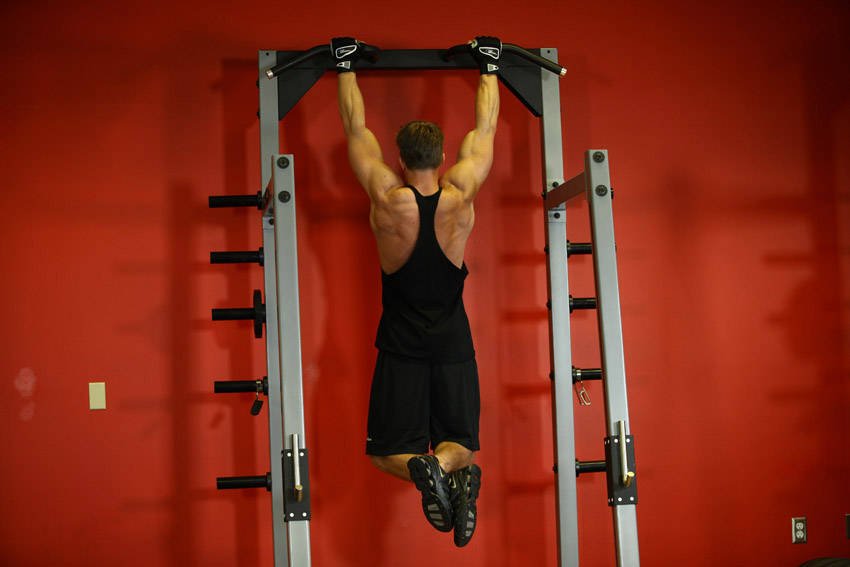
- Grab the pull-up bar with the palms facing forward using the prescribed grip. Note on grips: For a wide grip, your hands need to be spaced out at a distance wider than your shoulder width. For a medium grip, your hands need to be spaced out at a distance equal to your shoulder width and for a close grip at a distance smaller than your shoulder width.
- As you have both arms extended in front of you holding the bar at the chosen grip width, bring your torso back around 30 degrees or so while creating a curvature on your lower back and sticking your chest out. This is your starting position.
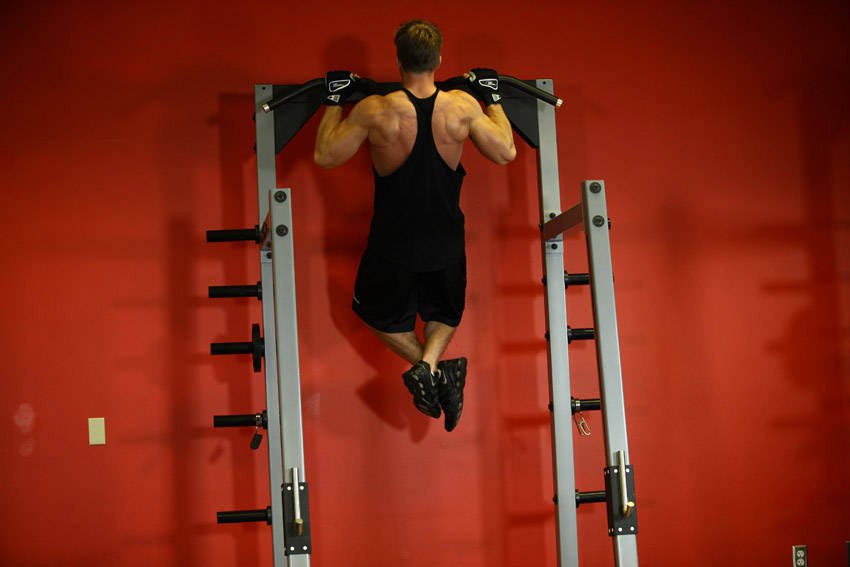
- Pull your torso up until the bar touches your upper chest by drawing the shoulders and the upper arms down and back. Exhale as you perform this portion of the movement. Tip: Concentrate on squeezing the back muscles once you reach the full contracted position. The upper torso should remain stationary as it moves through space and only the arms should move. The forearms should do no other work other than hold the bar.
- After a second on the contracted position, start to inhale and slowly lower your torso back to the starting position when your arms are fully extended and the lats are fully stretched.
- Repeat this motion for the prescribed amount of repetitions.
Phase 1: Own the Hang (Weeks 1–2)
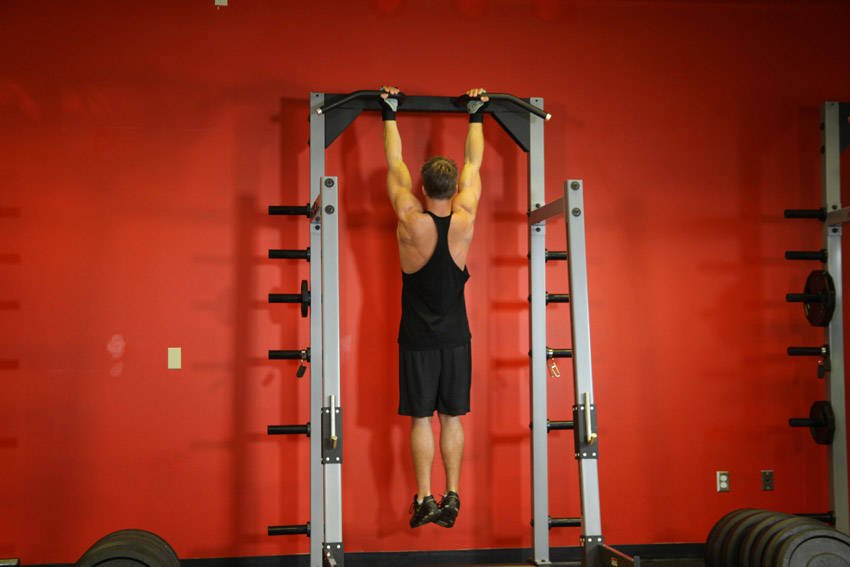
Before you pull, you hang. Grip is the first thing that fails for beginners — not the lats. Two weeks of dedicated hanging fixes that and teaches your shoulders to bear load safely.
- Dead hangs — 3 sets of 20–45 seconds. Shoulders active, not shrugged into your ears. Rest 90 seconds between sets.
- Scapular pulls — 3 sets of 8–10. From a dead hang, pull your shoulder blades down and together without bending your elbows. This tiny movement is the start of every pull-up you will ever do.
- Negative pull-ups — 3 sets of 3–5. Jump or step to the top position, then lower yourself over a full 5 seconds. Eccentric-only work builds strength fast in untrained lifters, which is exactly why negatives are the single highest-value exercise at this stage.
Pass test: 45-second dead hang and five controlled 5-second negatives. Do not move on before this — rushing Phase 1 is the number one reason people stall at zero reps for months.
Phase 2: Assisted Reps (Weeks 3–4)
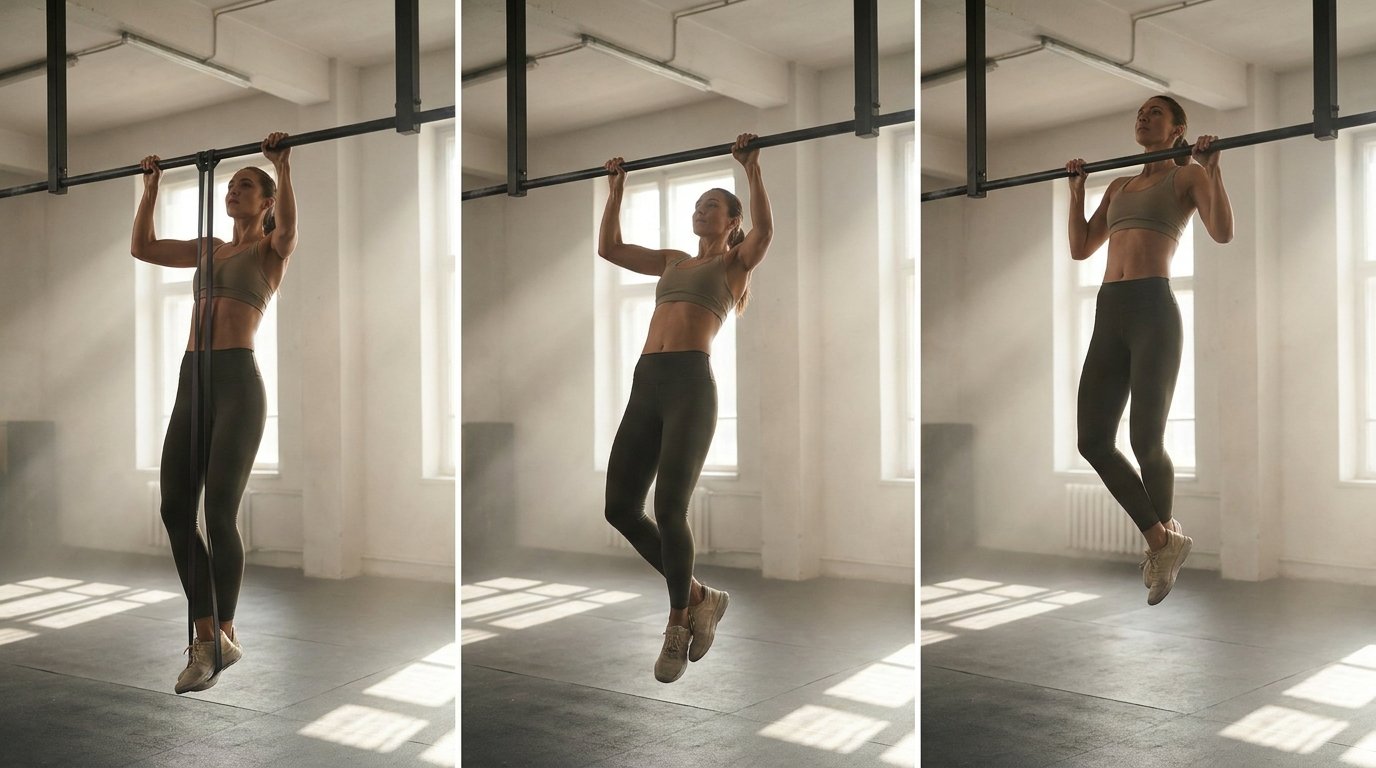
Now you practice the actual movement pattern with just enough help to complete full-range reps. A resistance band is the best tool: unlike assisted machines, it helps most at the bottom — where you are weakest — and least at the top.
- Band-assisted pull-ups — 4 sets of 5–8. Pick a band that makes the last rep hard but clean.
- Inverted rows — 3 sets of 8–12, feet on the floor, body straight, under a sturdy table or low bar. Rows build the mid-back strength that keeps your shoulders healthy through this program.
- Dead hangs — 2 sets of 45–60 seconds, at the end of the session.
Research comparing grip variations shows the chin-up (palms facing you) activates the biceps more strongly while producing comparable lat activation to a standard pull-up — which makes it a legitimate and slightly easier first target. If your first strict rep comes with palms facing you, count it. Standard grip follows within a week or two.
How to perform
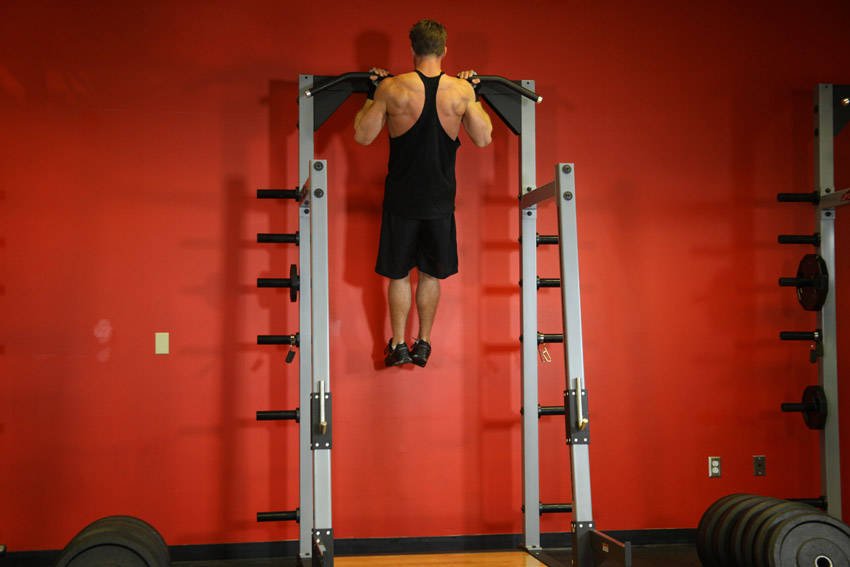
- Grab the pull-up bar with the palms facing your torso and a grip closer than the shoulder width.
- As you have both arms extended in front of you holding the bar at the chosen grip width, keep your torso as straight as possible while creating a curvature on your lower back and sticking your chest out. This is your starting position. Tip: Keeping the torso as straight as possible maximizes biceps stimulation while minimizing back involvement.
- As you breathe out, pull your torso up until your head is around the level of the pull-up bar. Concentrate on using the biceps muscles in order to perform the movement. Keep the elbows close to your body. Tip: The upper torso should remain stationary as it moves through space and only the arms should move. The forearms should do no other work other than hold the bar.
- After a second of squeezing the biceps in the contracted position, slowly lower your torso back to the starting position; when your arms are fully extended. Breathe in as you perform this portion of the movement.
- Repeat this motion for the prescribed amount of repetitions.
Phase 3: The First Rep (Weeks 5–8)
Open every session with one maximal attempt while you are fresh: dead hang, scapular pull, drive your elbows down, chin over the bar. When it comes — and it will, usually mid-set on a day you did not expect it — log the date. Then keep building:
- Max attempt — 1–2 singles, fully rested
- Band-assisted pull-ups — 4 sets of 6–8 with a lighter band than Phase 2
- Negatives — 2 sets of 3, slowed to 8 seconds
- Inverted rows — 3 sets of 12
Phase 4: Zero to Ten (Months 3–5)
From one rep to ten, the tool is submaximal volume — not grinding max sets. Two methods, used together:
- Session volume: 4 sets, stopping 1–2 reps short of failure. When your first set reaches 6 clean reps, you are close: a 6-rep first set almost always means 10 is 3–4 weeks away.
- Grease the groove: on non-training days, do 1–2 easy reps every time you pass your bar — never close to failure. Frequent, fresh, perfect practice is how the movement becomes cheap for your nervous system.
Track total weekly reps and add 10–15 percent per week. That is the entire progression model — boring, and unreasonably effective.
Beyond Ten: Weighted and Advanced Variations
Ten strict reps is the gateway to everything advanced. From here the path splits into two directions — heavier or harder:
Weighted pull-ups
Add load with a backpack: start at 5 percent of body weight for 3 sets of 5 and add roughly 2.5 percent when all reps are clean. Weighted work builds the raw strength that makes every unweighted variation easier.
Archer pull-ups
Pull toward one hand while the other arm stays nearly straight and assists. Sets of 3–5 per side. The archer teaches asymmetric loading — the doorway to one-arm strength — and requires roughly 12 clean standard reps as a base.
Typewriter pull-ups
From the top position, slide horizontally from one hand to the other while keeping your chin above the bar. Brutal time under tension for the lats and a locked-arm strength builder. Earn archers first; typewriters are archers with the descent removed.
Bar muscle-up
The muscle-up is not a stronger pull-up — it is a faster one plus a transition. Requirements: 10 strict reps, explosive chest-to-bar height on your best pulls, and straight-bar dips. Drill the transition with slow negatives from support position, and learn the false grip early. Most failed muscle-ups die at the transition, not the pull.
The Support Work Nobody Does
Two accessories quietly determine how far your pulling goes. The first is grip-neutral pulling to spare your elbows: high pull-up volume with a pronated grip is the classic recipe for inner-elbow pain. Rotating in a neutral-grip variation once a week is cheap insurance.
How to perform
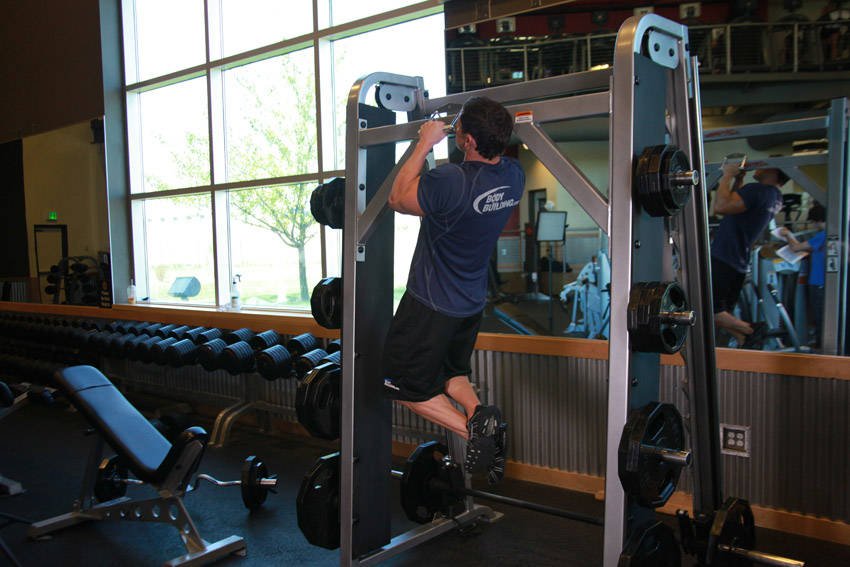
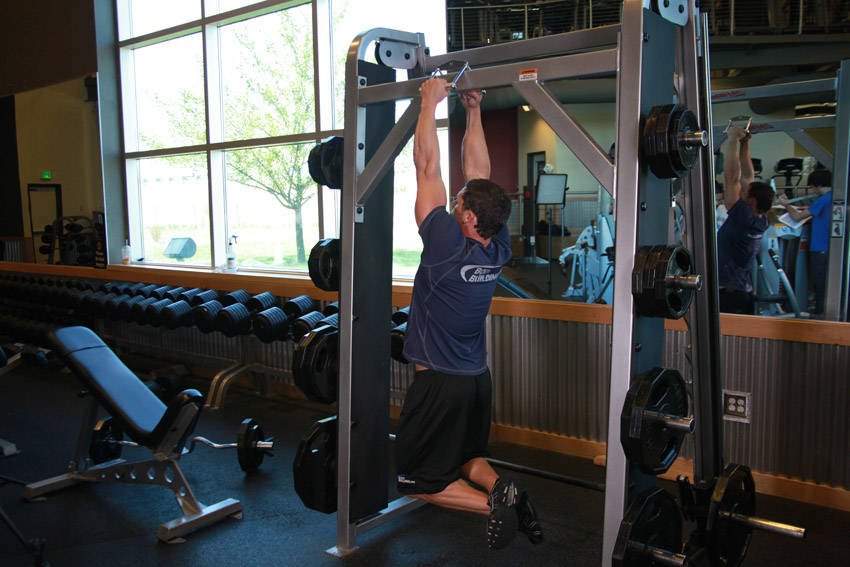
- Start by placing the middle of the V-bar in the middle of the pull-up bar (assuming that the pull-up station you are using does not have neutral grip handles). The V-Bar handles will be facing down so that you can hang from the pull-up bar through the use of the handles.
- Once you securely place the V-bar, take a hold of the bar from each side and hang from it. Stick your chest out and lean yourself back slightly in order to better engage the lats. This will be your starting position.
- Using your lats, pull your torso up while leaning your head back slightly so that you do not hit yourself with the chin-up bar. Continue until your chest nearly touches the V-bar. Exhale as you execute this motion.
- After a second hold on the contracted position, slowly lower your body back to the starting position as you breathe in.
- Repeat for the prescribed number of repetitions.
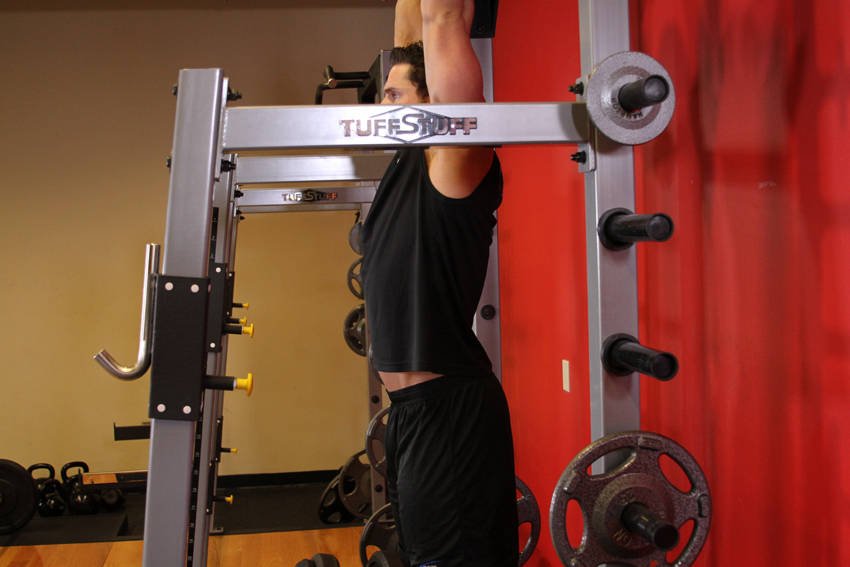
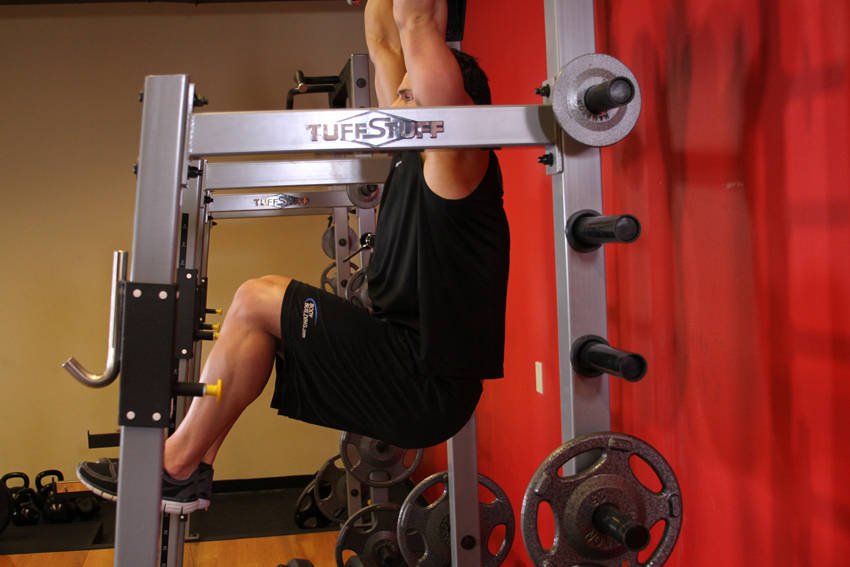
The second is hanging core strength. Every advanced variation — archers, typewriters, muscle-ups — demands a rigid hollow-body position under the bar. Hanging leg raises build exactly that, and double as extra grip work.
How to perform
- Hang from a chin-up bar with both arms extended at arms length in top of you using either a wide grip or a medium grip. The legs should be straight down with the pelvis rolled slightly backwards. This will be your starting position.
- Raise your legs until the torso makes a 90-degree angle with the legs. Exhale as you perform this movement and hold the contraction for a second or so.
- Go back slowly to the starting position as you breathe in.
- Repeat for the recommended amount of repetitions.
Round out your training week with pushing work — our push-up routine balances all this pulling — and keep your shoulders mobile with basic mobility drills.
Programming Rules
- Frequency: 3 pulling sessions per week, minimum one rest day between. More is not better while reps are under 10.
- Progress trigger: move to the next phase only after passing its test. The tests are the program.
- Plateau protocol: stuck for 2 weeks → drop back one phase for one week, then retest. Regression beats grinding.
- Equipment: a doorway bar ($20–40) and a set of resistance bands ($15–30).
Gear for this progression
Coach's pick · Training★★★★★ 4.6Doorway Pull-Up Bar
The one piece of gear that unlocks every pulling progression on this site.
Check price on AmazonAs an Amazon Associate we earn from qualifying purchases. Prices and availability change - check the listing.
Coach's pick · Training★★★★★ 4.5Resistance Band Set (Assisted Pull-Ups)
Graded assistance for the phase between negatives and your first rep.
Check price on AmazonAs an Amazon Associate we earn from qualifying purchases. Prices and availability change - check the listing.
Common Mistakes
- Kipping before strict. Momentum reps teach a different skill and hide strength gaps. Earn 10 strict first.
- Half range of motion. Full rep = arms straight at the bottom, chin over the bar at the top. Partial reps produce partial strength.
- Training to failure daily. Pulling strength grows on quality volume and recovery, not on grinding. If your last rep is ugly, the set went one rep too long.
- Skipping the hang. Grip and shoulder prep is not optional homework — it is the foundation everything else stands on.
FAQ
How long does it take to get your first pull-up?
With 3 sessions per week, most beginners get a first strict rep in 4–8 weeks. Starting from a 45-second dead hang and clean 5-second negatives, some get there in 3 weeks; starting from zero hanging ability, allow 10–12 weeks.
Are chin-ups easier than pull-ups?
Slightly, for most people. The supinated grip puts the biceps in a stronger line of pull while lat activation stays comparable, so a chin-up usually arrives one or two weeks before a standard pull-up. Both count as strict vertical pulling.
Should I lose weight before starting?
Start now regardless. Hangs, scapular pulls and negatives scale to any body weight, and pairing the program with modest fat loss is the fastest possible route — every kilogram dropped is a kilogram less to pull.
Can I train pull-ups every day?
Structured sessions, no — three per week with rest days wins while you are under 10 reps. Easy grease-the-groove singles on off days are fine because they never approach failure.
References
- Youdas JW, et al. (2010). Surface electromyographic activation patterns and elbow joint motion during a pull-up, chin-up, or Perfect Pullup rotational exercise. J Strength Cond Res. PubMed 21068680
- Ronai P, Scibek E. (2014). The Pull-up. Strength and Conditioning Journal. doi:10.1519/SSC.0000000000000052
- Douglas J, et al. (2017). Chronic adaptations to eccentric training: a systematic review. Sports Medicine. doi:10.1007/s40279-016-0628-4