


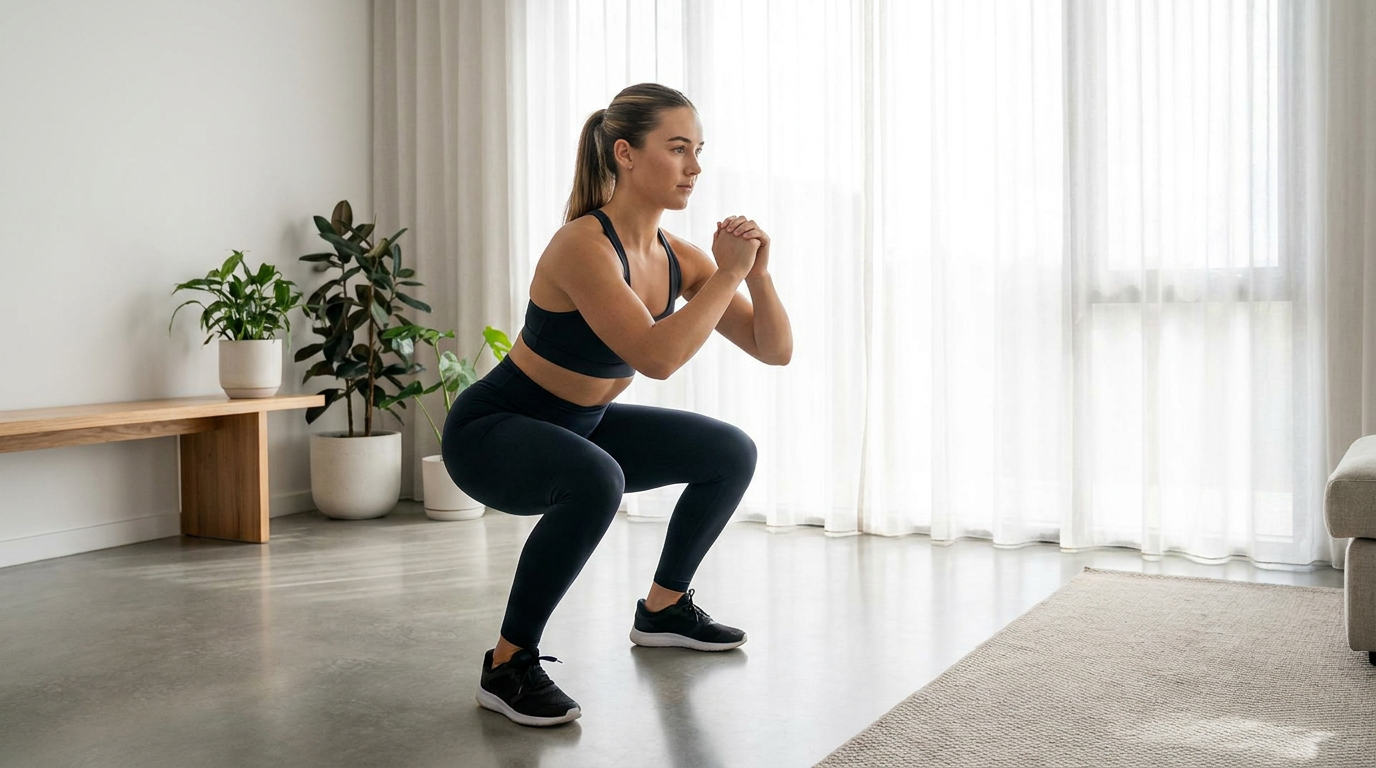
The short answer: train legs twice a week with 12—18 hard sets total, progressing from two-leg squats to split squats to single-leg work rather than adding reps forever. Most people stall because they only squat — you also need a hip hinge, a knee-flexion movement and direct calf work to build a complete lower body without weights.
Bodyweight leg training has a reputation problem. The standard objection is that your legs are too strong for your own body weight, so squats become cardio before they become strength work. That is true of the air squat and false of everything past it. The moment you shift to one leg you roughly double the load per limb, and unilateral variations scale far beyond what most people can handle. This guide is the ladder: five stages, the test that lets you move up, and the hamstring, glute and calf work that keeps the whole thing balanced.
The Progression at a Glance
| Stage | Main movement | Pass test | Typical time |
|---|---|---|---|
| 1. Foundation | Bodyweight squat | 3 × 25 full-depth, controlled | 2—4 weeks |
| 2. Split stance | Split squat | 3 × 12 per leg, knee touches floor | 4—6 weeks |
| 3. Elevated rear foot | Bulgarian split squat | 3 × 10 per leg from a chair | 6—8 weeks |
| 4. Assisted single leg | Shrimp squat / box pistol | 3 × 5 per leg, no hand support | 8—12 weeks |
| 5. Full single leg | Pistol squat | 3 × 5 per leg, heel down, no wobble | Ongoing |
The times assume two leg sessions a week. Do not move up because the calendar says so — move up when you pass the test twice in a row on separate days.
Stage 1: Own the Air Squat
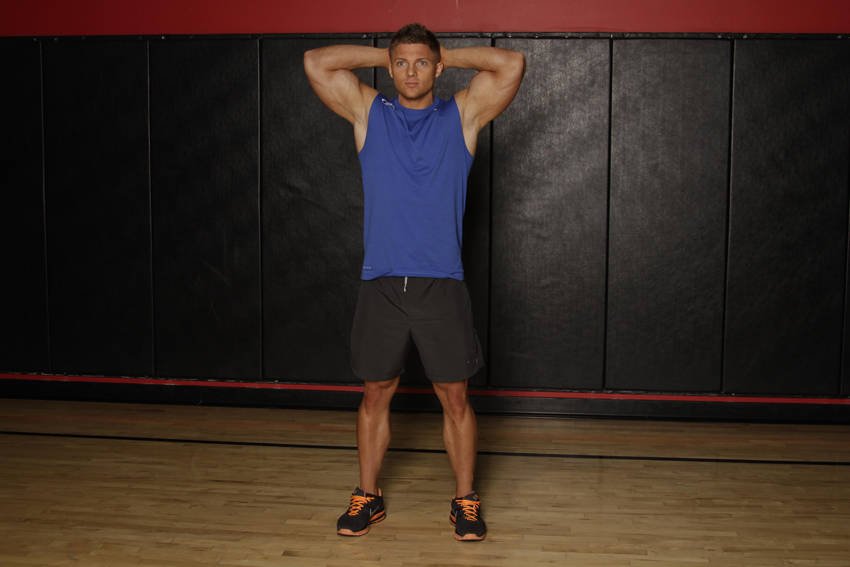
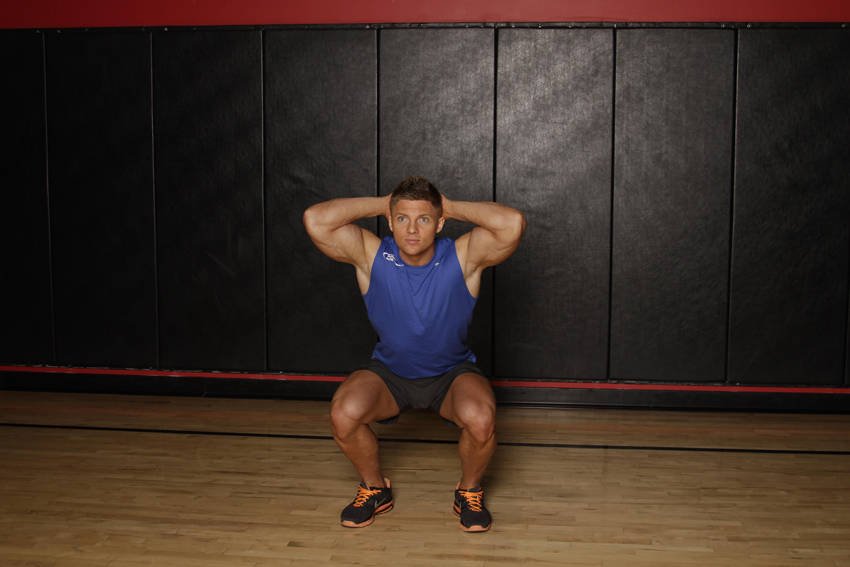
Full depth means the crease of your hip drops below the top of your knee, with your heels flat and your spine neutral at the bottom. If you cannot reach that, the limit is almost always ankle dorsiflexion, not strength. Test it: stand facing a wall with your toes 10 cm away and try to touch your knee to the wall without lifting your heel. If you cannot, spend two minutes per side on a deep-knee-bend ankle stretch before every session.
How to perform
- Stand with your feet shoulder width apart. You can place your hands behind your head. This will be your starting position.
- Begin the movement by flexing your knees and hips, sitting back with your hips.
- Continue down to full depth if you are able,and quickly reverse the motion until you return to the starting position. As you squat, keep your head and chest up and push your knees out.
Program it as 3 sets of 15—25 with a 3-second lowering phase and a 1-second pause at the bottom. The tempo matters more than the count: a 25-rep set done in 25 seconds is conditioning, the same set done in 100 seconds is strength work.
Pass test: 3 × 25 full-depth squats at a 3-1-1 tempo, heels flat, no forward collapse in the last five reps.
Stage 2: Split the Stance
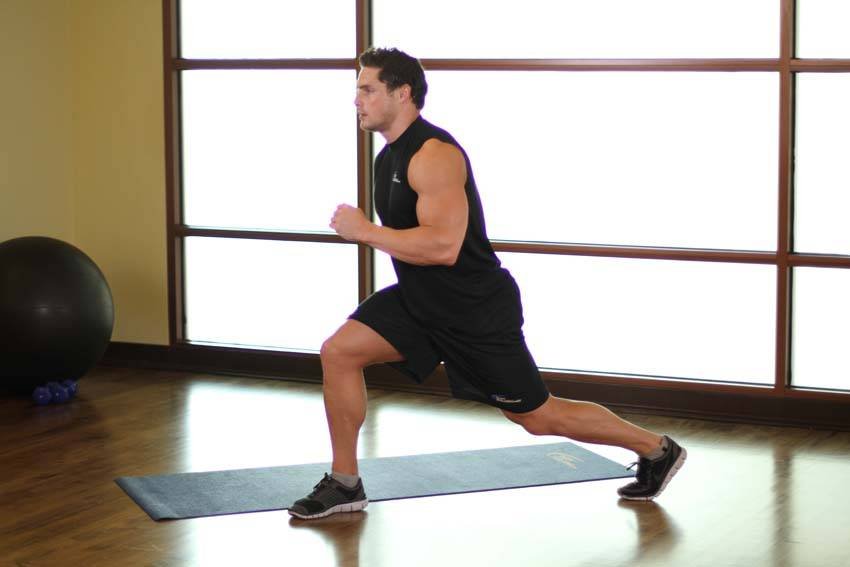
The split squat is where bodyweight leg training starts being strength training. Standing on one leg with the other only balancing puts roughly 70—80 percent of your mass on the front leg, and it exposes the side-to-side imbalance that two-leg squatting hides. Almost everyone finds one leg noticeably weaker here. Train the weaker side first and match the stronger side to it.
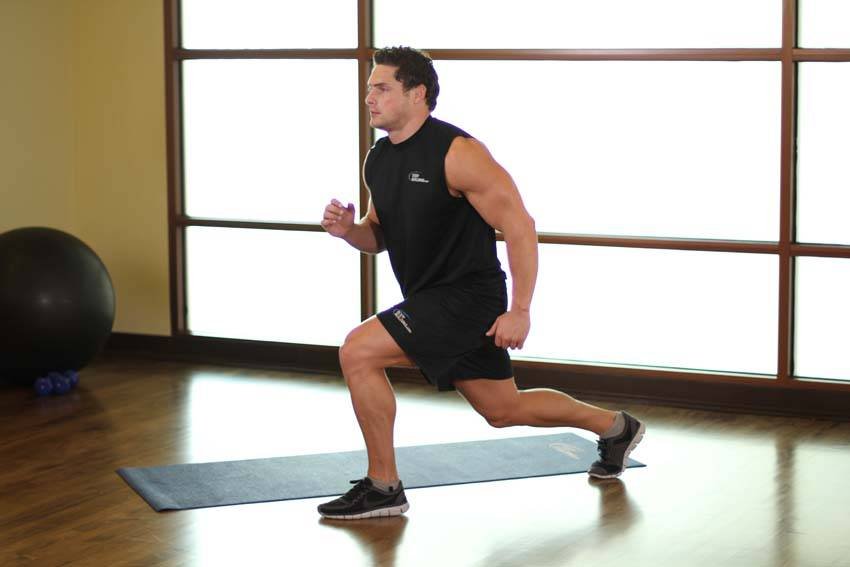
How to perform
- Being in a standing position. Jump into a split leg position, with one leg forward and one leg back, flexing the knees and lowering your hips slightly as you do so.
- As you descend, immediately reverse direction, standing back up and jumping, reversing the position of your legs. Repeat 5-10 times on each leg.
Set the front foot far enough forward that your shin stays close to vertical at the bottom and your rear knee touches the floor lightly. Sets of 10—15 per leg, 3 sets, 90 seconds rest. When 3 × 15 is comfortable, do not chase 20 — elevate the rear foot instead.
Pass test: 3 × 12 per leg with a controlled 3-second descent and a rear knee that touches without dropping.
Stage 3: Elevate the Rear Foot
Putting your rear foot on a chair, sofa or bottom step shifts more load onto the front leg and forces a much larger range of motion at the hip. This is the single highest-value leg exercise available without equipment, and it is where most people can stay for months while still getting stronger.
Progress it in this order rather than adding reps: raise the elevation from 20 cm to 40 cm, then slow the descent from 3 to 5 seconds, then add a 2-second pause at the bottom, then add a 1.5-rep style bottom pulse. Each change is worth roughly one difficulty step. That principle — changing leverage and tempo instead of counting — is covered across every movement pattern in our guide to progressive overload without weights.
Pass test: 3 × 10 per leg from a 40 cm elevation with a 3-second descent and no hand support.
Stage 4: Assisted Single Leg
Two routes lead to the pistol, and they train different things. The box pistol — a single-leg squat down to a chair, standing back up without pushing off — builds the strength. The shrimp squat — holding the rear ankle behind you and lowering that knee to the floor — builds the quad strength and hip-flexor mobility the pistol demands. Run both.
| Variation | Sets × reps | Progression step | Watch for |
|---|---|---|---|
| Box pistol, high box (50 cm) | 3 × 8 per leg | Lower the box 5 cm | Sitting down instead of controlling |
| Box pistol, low box (30 cm) | 3 × 6 per leg | Remove the box | Heel lifting off the floor |
| Assisted shrimp (hand on wall) | 3 × 6 per leg | Reduce hand pressure | Knee slamming the floor |
| Free shrimp squat | 3 × 5 per leg | Elevate the front foot | Losing the upright torso |
| Counterbalanced pistol | 3 × 5 per leg | Drop the counterbalance | Rounding the lower back |
Hold a 2—3 kg object at arm’s length in front of you for the counterbalanced pistol. It shifts your centre of mass forward and makes the movement possible months before you can do it empty-handed — a rare case where holding something makes a bodyweight exercise easier, not harder.
Pass test: 3 × 5 per leg to a 30 cm box with no hand contact and no bounce out of the bottom.
Stage 5: The Pistol Squat
A pistol squat is a full-depth single-leg squat with the free leg held straight in front, heel of the working leg flat throughout. It needs three qualities at once: single-leg strength, ankle dorsiflexion deep enough to keep the heel down, and enough hamstring length to hold the free leg up. Failing at any one of them looks like weakness and usually is not.
- Heel lifts at the bottom: ankle mobility. Stand on a 2 cm book heel-raise while you build it separately.
- Free leg drops: hamstring length or hip-flexor endurance. Practise seated straight-leg raises.
- You fall backwards: counterbalance. Extend your arms further forward.
- Knee caves inward: glute medius. Add single-leg glute bridges and side-lying leg raises.
Once you own 3 × 5 per leg, progress by elevating the working foot so the free leg can drop below it, then by adding a 3-second pause at the bottom. Both are harder than a rep count will ever be.
The Half Nobody Trains: Hamstrings and Glutes
Squat patterns are knee-dominant. Train only those and you build quads on top of hamstrings that never get loaded, which is both an imbalance and a wasted opportunity — the posterior chain is where most bodyweight athletes have the largest gap. Two movements close it.
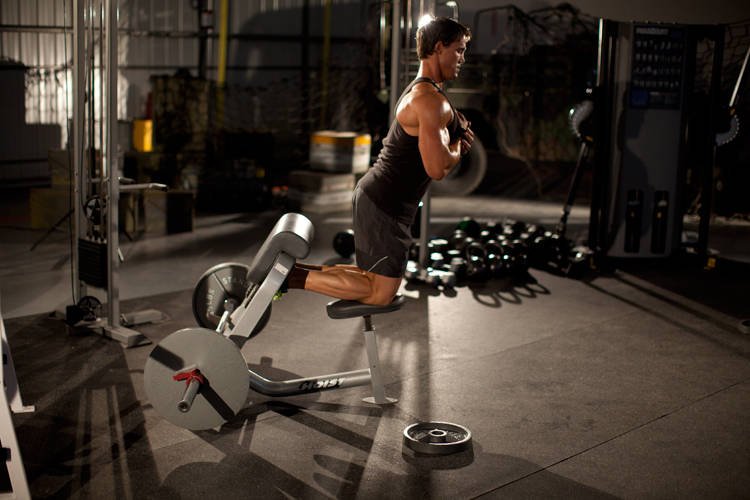
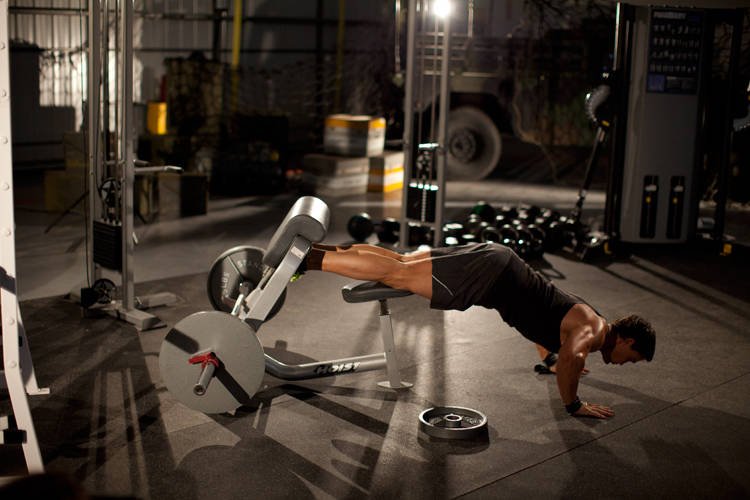
How to perform
- Using the leg pad of a lat pulldown machine or a preacher bench, position yourself so that your ankles are under the pads, knees on the seat, and you are facing away from the machine. You should be upright and maintaining good posture.
- This will be your starting position. Lower yourself under control until your knees are almost completely straight.
- Remaining in control, raise yourself back up to the starting position.
- If you are unable to complete a rep, use a band, a partner, or push off of a box to aid in completing a repetition.
The Nordic curl is the most demanding hamstring exercise available without equipment, and almost nobody can do a full one at first. Anchor your heels under a sofa, keep your hips extended, and lower yourself as slowly as you can before catching yourself with your hands. Start with 3 sets of 4 partial reps, and measure progress in how far down you get under control rather than in reps.
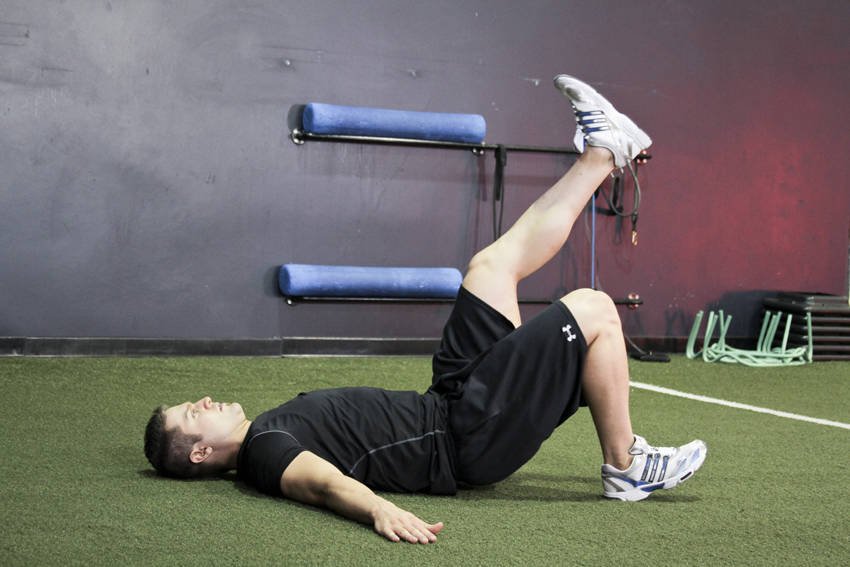
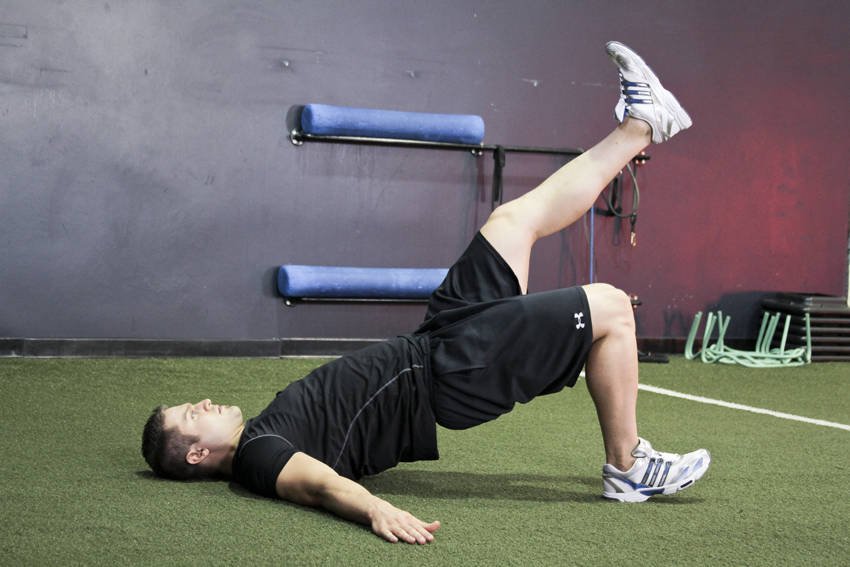
How to perform
- Lay on the floor with your feet flat and knees bent.
- Raise one leg off of the ground, pulling the knee to your chest. This will be your starting position.
- Execute the movement by driving through the heel, extending your hip upward and raising your glutes off of the ground.
- Extend as far as possible, pause and then return to the starting position.
Single-leg glute bridges handle hip extension and the glute medius stability that keeps your knee tracking on pistols. 3 sets of 12—15 per side with a 2-second squeeze at the top. Elevate your shoulders on a sofa when that gets easy — the longer range roughly doubles the difficulty.
Calves need direct work too, and they need volume: single-leg calf raises off a step, 4 sets of 15—20 per side with a full stretch at the bottom and a one-second hold at the top, twice a week.
Putting It Into a Week
| Session | Movement | Sets × reps | Rest |
|---|---|---|---|
| Day A | Current squat stage | 4 × stage target | 2—3 min |
| Day A | Nordic curl (partials) | 3 × 4—6 | 2 min |
| Day A | Single-leg calf raise | 4 × 15 | 60 s |
| Day B | One stage below current | 3 × 12—15 | 90 s |
| Day B | Single-leg glute bridge | 3 × 12 per side | 60 s |
| Day B | Jump squat | 4 × 6 | 2 min |
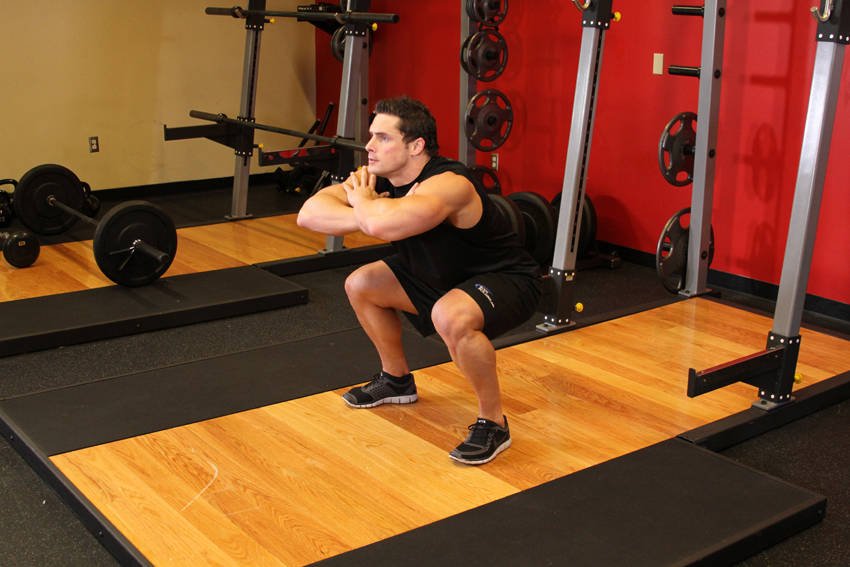
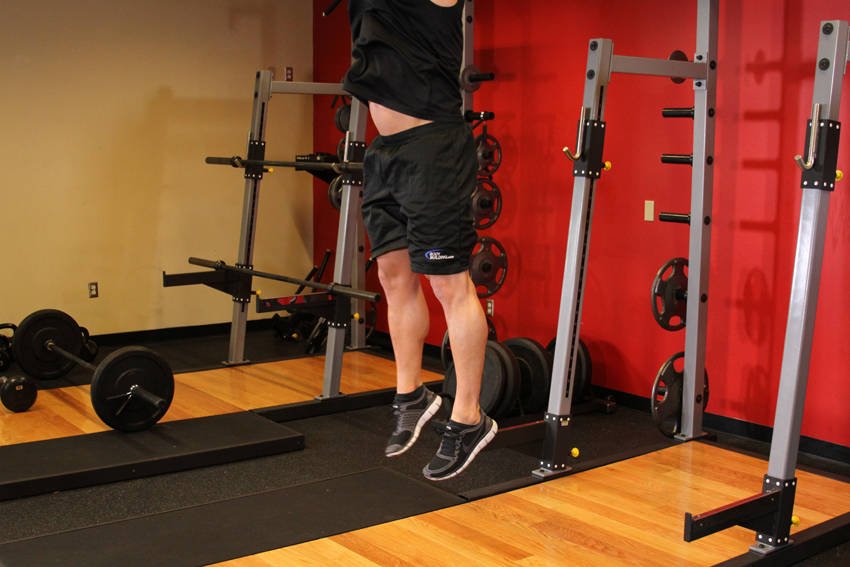
How to perform
- Cross your arms over your chest.
- With your head up and your back straight, position your feet at shoulder width.
- Keeping your back straight and chest up, squat down as you inhale until your upper thighs are parallel, or lower, to the floor.
- Now pressing mainly with the ball of your feet, jump straight up in the air as high as possible, using the thighs like springs. Exhale during this portion of the movement.
- When you touch the floor again, immediately squat down and jump again.
- Repeat for the recommended amount of repetitions.
That is 11—14 hard sets per week for the lower body, which sits in the range where meta-analysed volume research still shows dose-dependent growth. Leave at least 48 hours between the two sessions. Day B being one stage easier is deliberate: it gives you a volume day that does not compete with the quality of your hard day.
None of this builds anything if you are under-eating — single-leg work is expensive, and legs are the largest muscle group you own. Our calisthenics nutrition guide sets the calorie and protein numbers, and the wider bodyweight training guide shows how to slot leg days around upper-body work like the pull-up progression.
Common Mistakes
- Chasing rep counts. Sets of 50 air squats train endurance. Move to a harder variation instead of a longer set.
- Skipping the hinge. A leg day without hamstring work is half a leg day, and it is the half that protects your knees.
- Training only to a chair. Box work is a stepping stone. If your box height has not dropped in six weeks, you are maintaining, not progressing.
- Ignoring the weaker side. Always start unilateral work with the weaker leg and cap the stronger leg at the same number.
- Adding jumps too early. Plyometrics belong after Stage 2, not before — they need a control base you do not have yet at Stage 1.
- No calf work at all. Calves are the most commonly skipped and the least forgiving to skip, since ankle strength gates the pistol.
FAQ
Can you really build leg muscle without weights?
Yes, provided you reach genuine proximity to failure. Meta-analyses comparing low-load and high-load resistance training find similar hypertrophy when sets are taken close to failure, which is exactly what single-leg bodyweight work forces. The two-leg air squat is the limitation, not bodyweight training itself.
How long does it take to get a pistol squat?
From a starting point of 3 × 25 clean air squats, most people reach a first unassisted pistol in four to eight months of training legs twice a week. Ankle mobility is the most common thing that stretches that timeline, and it is worth addressing on day one rather than at Stage 4.
How often should I train legs?
Twice a week, 48 hours apart, with 12—18 hard sets across both sessions. Three sessions works if you keep total weekly sets in the same range rather than adding a whole third session of volume on top.
My knees hurt during single-leg squats. What now?
Drop back one stage, shorten the range so you stop above the painful angle, and slow the descent to five seconds. Add single-leg glute bridges and side-lying leg raises for glute medius, which is frequently the reason the knee travels inward under load. Pain that persists past two weeks of that is a physiotherapist question, not a programming one.
Do I need to jump to build athletic legs?
For strength and size, no. For rate of force development — sprinting, changing direction, jumping higher — yes. Add 4 sets of 6 jump squats or split jumps once a week from Stage 2 onwards, always at the start of a session while you are fresh.
References
- Schoenfeld BJ. (2010). The mechanisms of muscle hypertrophy and their application to resistance training. Journal of Strength and Conditioning Research. PubMed 20847704
- Schoenfeld BJ, Grgic J, Ogborn D, Krieger JW. (2017). Strength and hypertrophy adaptations between low- versus high-load resistance training: a systematic review and meta-analysis. Journal of Strength and Conditioning Research. PubMed 28834797
- Schoenfeld BJ, Ogborn D, Krieger JW. (2017). Dose-response relationship between weekly resistance training volume and increases in muscle mass: a systematic review and meta-analysis. Journal of Sports Sciences. PubMed 27433992